2012 in review

The WordPress.com stats helper monkeys prepared a 2012 annual report for this blog.

Here’s an excerpt:

The new Boeing 787 Dreamliner can carry about 250 passengers. This blog was viewed about 1,600 times in 2012. If it were a Dreamliner, it would take about 6 trips to carry that many people.

Click here to see the complete report.

Blower Door Results and NAHB National Green Building Standard certification

COMING SOON….

We are currently finalizing certification and performance data and I will post in the coming weeks when completed!

I can confidently say though that this home will operate at least 65%  BETTER than a home built to MI Uniform Energy Code and is built to last a minimum of 100 years, with routine maintenance, by incorporating building techniques for proper water management – the biggest reason for house failure and deterioration!

If you didn’t catch it in one of my earlier posts, one of the single largest homes expenses is Heating.  This homes modeled heating costs will be only $250 annually (or roughly $20 p/month).  Pretty cool stuff!

Project Complete!

All but a few small finishing touches, and this project is done!..  and it marks our 3rd completed this year with 2 to go.  It still amazes me that we can go from nothing to a completed home in 10 weeks!  Thanks to all the great volunteers, and there were a lot of them, that helped make this home possible for the Deik family.  The partner family receiving the home, Dave and Stacie Deik, are a great family and well deserving of taking ownership of this home!  This house was very special when compared to previous projects, due to all the innovative building envelope details and the primary mini-split mechanical heating and cooling system.

To highlight the features that are unique to this Habitat home:

  • Frost Protected Shallow Foundation built with Reward ICF blocks
  • 6″ of High Density foam under thermally broken slab
  • 10-1/2″ Exterior Walls (2×6 + 4″ of exterior foam)
  • Furring strips and Rain Screen for cladding ventilation and attachment
  • 18″ Energy Heal trusses (and the first Hab home with a cathedral ceiling)
  • ERV ducted independently from conditioning ductwork
  • Ducted and non-ducted Mini-Split whole house heating/ cooling system
  • Exhaust vent in garage to outdoors with motion activation

Exterior – 6/25/12

Exterior – 6/25/12

Landscaping – 6/26/12

Exterior – 6/25/12

Exterior – 6/25/12

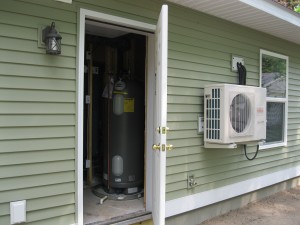
Mechanical Room – 6/25/12

Rheem Marathon Electric DHW

Rheem Marathon Electric DHW

RenewAire Energy Recovery Ventilator

Garage Ventilation – Motion Activated

INTERIOR PHOTOS

Kitchen – 6/25/12

Kitchen – 6/25/12

Rear Door Coat Locker – 6/25/12

Family Room – 6/25/12

Hallway – 6/25/12 (LED Lighting)

10-1/2″ wall cavity! Be-a-u-tiful !!

Mini-Split Control Center

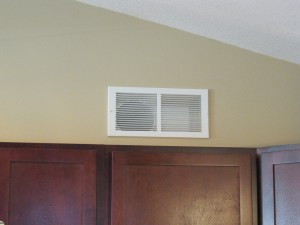
Ducted Mini-Split supply (1 per/ bedroom)

ERV Supply diffuser (1 per/ bedroom)

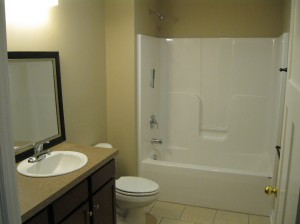
Bathroom – 6/25/12

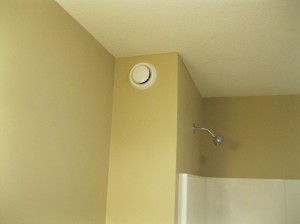
ERV Return air (1 per/ bathroom & kitchen)

ERV Return air (1 per/ bathroom & kitchen)

Stackable Washer/Dryer Combo

Interior Finish

Drywall is complete, primed and first coat of finish paint applied.  Interior doors are hung and painted and millwork is being installed.  Quick Step laminate floors installed in all bedrooms, hall, living room, dining room and kitchen.  Tile flooring installed in bath and entries.  Cabinets going in this week.

Not sure if anything jumped out at you in the above described, but there is NO carpet anywhere in this house.  Whenever possible, we discourage the homeowner from adding carpet to help improve the Indoor Air Quality (IAQ).  Carpet traps dust and allergens and reduces air quality in the home.  We also add impervious (tile) flooring to entrances and bath areas for durability (LEED for Home requirement also).

Bedroom

Bath

Living Room

‘The Mini-Split’ continued…

Finally completed the hallway ducted mini-split head (1 of 2 total).  Each head produces about 9000 btu’s with a peak of 11,ooo btu’s.  Remember, our house was modeled based on thermal envelop and heating load at only 11.5000 btu’s, so the 1 ton mini-split is more than sufficient to provide our heating needs.  We also designed the system so that it would be zoned – 1 head (ducted) that runs the length of the hallway with 1 supply register into each bedroom and an additional head (wall mounted) that supplies the main living area and kitchen.  The beauty in this, is that the homeowner can call for heating/ cooling depending on which section of the house they will be occupying. i.e. – at night, they can heat or cool the bedrooms as they sleep and moderate the temperature in the living room/ kitchen and vice versa during the daytime hours.  It is a much more efficient way to provide comfort and obviously is considerably less wasteful by not conditioning rooms that are not occupied!

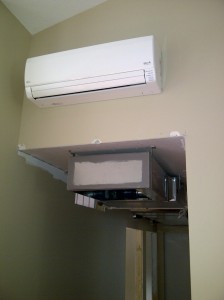
Wall mount head – Kitchen/ Living/ Dining supply

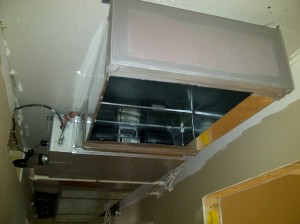
Mini-Split ducted head and Return air

Mini-Spit duct – Hallway run and feeds

Ducted head line-set and condensation drain

Mini-Split ducted head access for service (through bedroom wall)

Condensation drain feeds to Utility Room washer discharge

Framed hallway ductwork (pre-drywall)

Framed ceiling beneath ducting for drywall finish

Supply boot to bedroom from main duct

Mini-Split access through bedroom

Line-set(s) connected

Line set(s) connection at unit

Exterior Completed!

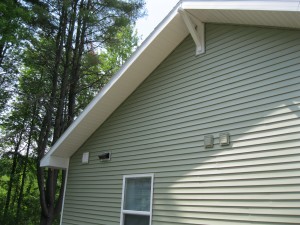
In addition to framing, exterior siding is another volunteer intensive project.  The added furring strips over exterior foam really made installation much more managable by providing a great nailing surface for the vinyl.  The difficult, or tricky part, was making sure we flashed properly around windows, doors and mechanical penetrations.
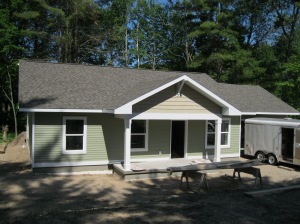
Completed exterior

As with every new project we start, we modify and address issues with previous homes.  Durablity and exterior water management become big issues in the longevity of a home, so we now build all new homes with concrete porches (instead of framed PT wood) and added 2′-0″ overhangs to the gable ends to extend the drip line away from the home.  Properly flashing is a detail that cannot be overlooked and if done incorrectly, can cause the most significant damage to your new home (especially if the mistake is made and not easily visible).  I get teased quite often around the jobsite because I’ve self designated myself as the QC (Quality Contol) inspector.  The key is to identify the issue, talk through the solutions, and implement.  It is also improtant that all trades subs and on-site supervisors have the same standards.

Front porch

Foundation coating/ parging is required to cover ICF EPS foam at grade.  I prefer to use an acrylic based product called Styro TUFF II.  It is a troweled on, pre-mixed product (similar to stucco in an EIFS system) and applied over a peal and stick fiberglass re-inforced mesh that afixes to the foam.  This protects the foam from weed timming, animals, pests, etc.  We apply the product down about 9″ from mudsill, so the balance of the exposed ICF block below the TUFF II in the photo, will be covered with backfill at finish grade.

TUFF II foundation coating

TUFF II foundation coating

Insulation & Air Sealing

OK….  This is slightly complicated, but I’m going to try and cover all the steps we use to perform air sealing and insulation in one.  My preferred method of air sealing is using the OSB sheathing on the exterior wall and ceiling drywall above as my air barrier.  This said, it is important to seal all connections between floor plates, vertical stud to sheathing connections and wall partitions/penetration in the ceiling.  The best way to approach this is by drawing an imaginary line all around the perimeter of the home and seal all known areas of leakage in this plane.  My system is a bit redundant, because I also use an airtight drywall approach when installing drywall (continuous perimeter adhesive application around walls, windows & doors) as drywall is being installed.

Air Leakage Diagram – Building Science Corp

Air Sealing Detail OSB – Building Science Corp

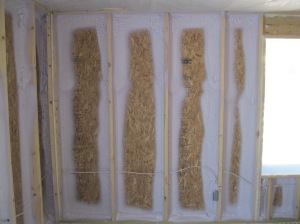
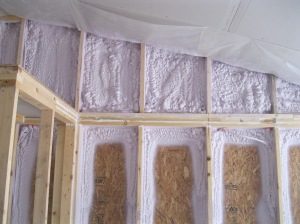
Sealing begins with using a high quality silicone or acoustical caulk along all bottom plate, king & jack studs, and double top plate.  I then ‘picture frame’ the stud cavities with closed cell spray foam.  Finally all the partitions and penatrations in  the attic are sealed with closed cell foam to give me a continuous air barrier on all six sides of the home.

Bottom Plate Cault & CC foam cavity

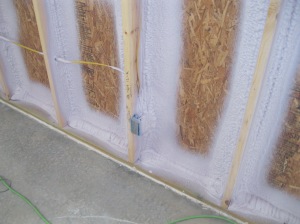
Electrical Outlets sealed

Wall cavity sealed – Picture framed Closed Cell foam

Cathedral wall air sealing

JM Spider 1.8# blown fiberglass

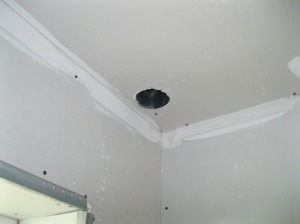
Bath Fan & Attic Baffles – Air Sealing

Ceiling Light fixture – Air Sealing

Ceiling Wall partitions – Air Sealing

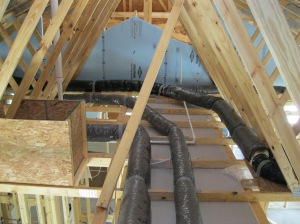
Mini-Split & ERV ducting complete

Round two on HVAC Mini-Split post….   Hallway ceiling ductwork for mini-split head #1 complete.  As most of you following this blog, especially the HVAC portion of the build, are wondering, how do you keep a home comfortable with such a small amount of supply air being provided in the home.  Trust me, it was a big concern for me also.  We essentially have only 1 supply duct feeding each bedroom and a wall mounted head supplying the kitchen, dining and living areas.  What we didn’t want was hot or cold spots in the home.  It starts with high levels of insulation in the thermal envelope to reduce heat loss through the wall system.  Second, is controlling distribution, or air flow, through each room.  The mini-split system is essentially the same as a traditional forced air ducted system, supply and return, but on a much smaller scale.  In addtition to what the mini-split provides in air flow, we also felt the ERV would provide a good mix of air movement by ducting each of the same rooms as the mini-split.  That said, each room has a heat supply duct and an ERV (fresh air) supply duct.  We placed them on opposite ends of each room so that the air would mix as it’s being provided.  The return air for the mini-split head will be in the hallway drawing from the entire house.  The ERV return air pulls from the kitchen and bathroom (rooms with the highest concentration of poor air quality).  In the end, we feel the house will be comfortable no matter where you are located!

Ducted mini-split supply – 5/21/12

Bedroom Supply register – 5/21/12

ERV 4″ Bedroom Supply Air -5/21/12

Bathroom ERV return air – 5/21/12

Kitchen ERV return air – 5/21/12

ERV Ducting – 5/21/12

Bathroom, Kitchen Range & ERV exhaust (outside) – 5/21/12

Hallway view of Rough-in Mini-split head line-set – 5/21/12

HVAC – The ‘Mini-Split’!…

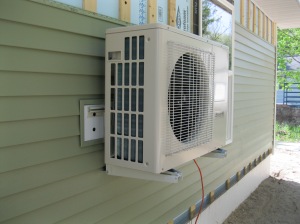
The big day is here!…  Mini-Split rough in has started!  It’s a bit difficult to tell without facial expressions being posted, but if you can imagine being 8 years old again on Christmas Eve and the level of anticipation you had, well that’s me.  This system was made for a high performance home, and that’s what we build.  The Fujitsu unit we are using is so effecient that for every 1 kw of electricity it consumes it produces 3.2 kw of heat (COP 3.2).  For those of you that are unfamiliar with what a mini-split heat pump is, imagine the heating/cooling unit you use when you stay at a hotel.  That wall mount thingy just under the window in your room controls both heating and cooling of that space.  It has the ability to heat or cool by pulling the heat out of the outside air (heating) or inside air (cooling).  The system we use is more centralized to support the entire home, but the concept is the same.  As metioned in earlier posts, our modeled heat load on this home is only at 11,500 btuH and the smallest forced air furnace available is 45,000 btuH, so the alternative was to find a smaller more efficient heating system – hence the mini-split.
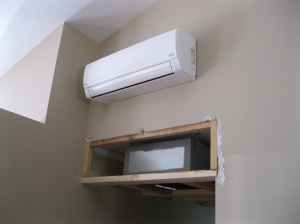
This post will be long and in multiple segments, but hopefully educational on looking at alternative ways of heating homes!  Please ask questions by posting comments on this post if you have any and I will answer all that I can.
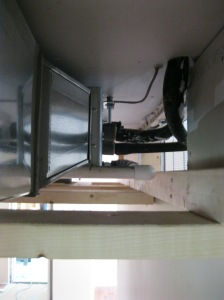
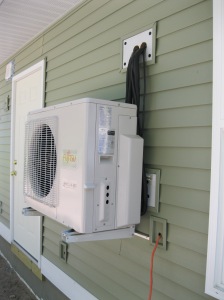
Fujitsu 1.5 ton mini-split

HSPF (Heating) 9.2 / SEER (Cooling) 17

Mini-split mounted

Mini-split mounting bracket

Garage & Porch concrete slabs

Garage & porch slabs were poured early this morning.  Porch has a 1″ slope in 6′-‘0 to direct water away from the home.  It is also important that you include a capillary break or flashing where the concrete (porch) and foundation mudsill (wood) meet.  We also wrapped our 4×4 porch post with flexible peel and stick flashing.  Concrete does a very good job of holding water and that moisture can deteriorate an organic material such as wood.

Concrete porch post wrap – 5/15/12

Concrete porch post wrap – 5/15/12

Concrete porch – 5/15/12

Garage concrete – 5/15/12

Finished garage floor – 5/16/12

I’ve included a few photos of a deep energy retrofit remodel project we did last year to show the effect of what concrete can do to wood after 40+ years  of exposure to moisture and no flashing!… (home was built in 1968)

Bond/Rim joist rot from concrete moisture

Bond/rim board rot from deck ledger